The MIB tree panel displays the MIB objects defined by the loaded MIBs as a tree. Each node represents an object. All objects below the Objects node have an object identifier assigned which is shown as tooltip. Type assignments and textual conventions do not have an object identifier assigned and thus they are displayed below the Textual-Conventions node.
By clicking on a node, the SMI definition of the corresponding object is displayed in the SMI Definition tab of the Info/Tools panel. In addition, the MIB module(s) defining the object will be selected in the MIB Modules tab of the MIBs panel.
All MIB Explorer's basic functions can be accessed from the tree node's context menu which is displayed by clicking with the right mouse button on a node.
Instances of MIB objects (variables) can be displayed in the MIB tree as well.
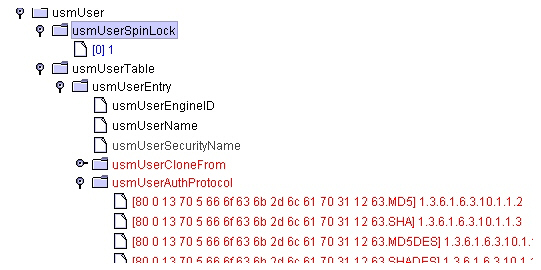
See also the below sample MIB tree cutout.
In contrast to MIB objects, instance nodes are displayed as two parts:
1.The instance's index objects' values enclosed in brackets ([ ]).
2.The value of the variable.
The OID of a MIB object instance is composed by appending its index OID to the OID of the corresponding object type. MIB Explorer displays the index OID of an instance within two brackets [and]. Scalar instances like usmUserSpinLock.0, have [0] as their index value if the corresponding MIB object is known. If not, the index denotes the whole path down from the last known MIB object's OID to the instance's OID. The complete OID of an instance or any other node is shown by the node's tooltip.
|
|
The browse tab shows MIB object instances in a table. The object instances are retrieved from a target agent using the Browse function. You can directly change browsed values within the browse tab by simply editing them. All values with a blue background can be edited.
By changing the general preferences to allow changing read-only values, all browsed values may be edited even if the corresponding MIB defintion specifies it as read-only.
Whether a value is editable or not, is determined by their corresponding MIB specification. If such a specification is not available (i.e., not loaded) then the value is assumed to be editable. However, the agent may reject a change in any case because of its own constraints.
The result table of the Browse Tab can be searched for object names and values using the ?? Search Panel if the Browse Tab is selected.
To Browse a Target:
1.Select the target you want to browse from the Target toolbar.
2.Select the subtree (node) you want to browse in the MIB tree.
3.Choose Browse ( ) from the Edit or the tree's context menu.
During the browse operation, the status bar shows the instances received from the agent so far. Retrieved instances are displayed immediately, when the option "Refresh browse view during operation" is enabled in Preferences. However, this option drastically slows down the operation.
The browse operation can be canceled by pressing the status bar's Stop button ( ). Any instances received so far will then be displayed in the browse table.
The Progress Bar displays the portion of the timeout value passed for the current request. If the displayed value reaches 100% during a browse operation you should consider increasing the timeout value for the target.
Each row in the table represents a MIB object instance. The columns are:
OID
Tip: By clicking on an OID, the corresponding object (denoted by the OIDs last name) will be selected in the MIB tree.
The object identifier of the object instance. Typically the OID of an instance is displayed as the corresponding MIB object's last name and the instance sub-identifiers. The complete OID is displayed as tool-tip or if the option "Resolve OIDs to object names" is deactivated in Preferences.
If the corresponding MIB object for an instance is not defined in the loaded MIB set, then the row will be displayed with orange background.
Syntax
The SNMP syntax of the MIB instance as received from the agent. If the syntax is not compatible with the syntax defined for the corresponding MIB object in a loaded MIB module, then the row will be displayed with red background. A red background may also indicate that there are two MIB modules loaded that define the same MIB object with different syntax. If you are unsure whether a returned value does not match its MIB definition, check with the Node Info window whether all syntax definitions for that object are consistent.
Tip: You can copy the content of a single cell or a range of cells to the clipboard by pressing <Ctrl-C>. The format of the copied content is compatible with most spreadsheet applications.
Value
The value of the MIB instance. Values are formatted according available MIB information such as DISPLAY-HINT and enumerations. If there is no formatting information for an OCTET STRING type, then its value is displayed as a printable string where non-printable characters are displayed as dots. The tool-tip then displays the hexadecimal string representation.
If the value has a blue background then you can directly edit it. When you press <Enter> after having changed the value it will be directly changed in the agent by sending a SET PDU to the active target. If the SET request fails a corresponding error message is displayed in the status bar. Changes can be undone and redone by using the context menu of the value column. For a description of the input formats supported, please see the Set Dialog documentation.
The node label colors in the MIB tree have the following meaning:
Black denotes a not-accessible or accessible-for-notify MIB object as well as textual conventions or type assignments.
Gray denotes a read-only MIB object type or instance.
Light-Gray denotes any MIB object that is obsolete or deprecated.
Blue denotes a read-write MIB object type or instance.
Red denotes a read-create MIB object type or instance.
Orange denotes a trap or notification type.
The background color green denotes a bookmarked MIB object.
The MIB tree's context menu can be accessed by clicking with the right mouse button on a node. It provides the following functions that are also partially available from the main menu:
Browse
Selects the browse tab and sends a series of GETNEXT (SNMPv1) or GETBULK (SNMPv2c/SNMPv3) requests to the target agent in order to get all instances that are available in the selected node's subtree.
Get
Displays all MIB object instances whose OID starts with the OID of the selected node in the MIB tree. If the SNMP protocol for the current target is SNMPv1 a series of GETNEXT request PDUs is sent to the target until an error or an instance with an OID outside the node's subtree is returned. If the protocol is SNMPv2c or SNMPv3 a series of GETBULK requests is sent until an error, exception, or an OID outside the node's subtree is returned by the target agent. Getting a single instance, for example the instance of a scalar MIB object, can be ineffective, depending on the max repetitions value set in Preferences. In such cases it might be more efficient to issue a Get on a parent node in order to get more instances at once.
A double click on a node is a shortcut for this function.
Table
Opens a table view that displays scalar or tabular instances as a table for the currently selected target agent.
Table (*)
Opens a table view that displays scalar or tabular instances as a table. The table content is sorted by instance index + target by default. Thus, row instances from different targets but with same index can be directly compared.
With the Copy... function from the table‘s context menu, you can copy the writable column‘s values to one or more target rows of the same or a different target agent.
Grid (Pro Edition)
Opens a grid view that displays one or more related SNMP tables as a hierarchy of tables. The Grid View is not available for Nimbus look & feel.
Set
Opens a set dialog to modify or create a single MIB object instance.
Subtree
Clear
Remove all instance nodes from the subtree. MIB object nodes are not affected by this operation.
Expand All
Expand all nodes (including MIB object instances) in the subtree.
Collapse All
Collapse the subtree.
Hide Absent
Remove those nodes from the subtree that denote a subtree which (currently) does not contain any MIB instances available from the target agent. In particular, conformance statements, object groups, and notification definitions will be hidden from the tree. To show all objects again, choose Refresh from the Edit menu.
Dump Subtree
Dump the subtree to a given text file as a tree. MIB instances contained in the subtree will be dumped too. If you do not want instances to be dumped, remove them from the subtree first by using the Clear button. This function is especially useful for documentation purposes.
Node Info
Shows the Node Info window that displays all SMI definitions for the selected node's OID. Normally there is only one MIB module that defines an OID.
Bookmarks
Toggle
Toggle the bookmark for the selected node. Only MIB objects with OID can be bookmarked.
Previous
Go to the closest lexicographic smaller MIB object (if available) that is bookmarked.
Next
Go to the next lexicographic greater MIB object (if available) that is bookmarked.
Copy OID
Copies the object identifier in dot-notation into the clipboard.
The set dialog can be used for setting (modifying or creating) a single MIB object instance at once. If you only need to modify existing values, you can also use the Browse panel.
To Perform a Set:
1.Select a node in the MIB tree representing
the MIB object instance you want to modify or
the MIB object for which you want to create/modify an instance.
2.Choose Set Instance from the Edit menu or Set from the nodes context menu.
3.If you have selected a non-scalar MIB object, enter the index value(s) for the instance you want to modify/create. The format for the entered index objects depend on the type of the respective object (see below). Each given index value will be checked for size constraints. If an object value violates such a restriction, then the corresponding object name will be reported in an error message when OK is pressed, the PDU will not be sent, and you will then be able to adjust the value.
4.Enter the new value in the Value field. If the underlying node is an instance, its value and index will become the preset values, otherwise the DEFAULT value specified for the MIB object (if present).
The value format for OCTET STRING syntaxes is as specified in the DISPLAY-HINT clause of the OBJECT-TYPE specification, if present. Otherwise, the default format as specified in the View preferences (see section “View” on page 23) applies if that is not MIB. In the latter case, the string has to be entered in hexadecimal format.
5.Press OK to send the SET request PDU to the target agent.
6.If the request was successful, the corresponding instance node will be created or updated. Otherwise the Status Bar will provide information about the error occurred.
Depending on the object‘s Type the value has to be entered as follows:
OCTET STRING
If there is a DISPLAY-HINT format defined for the MIB object, the value has to be entered according to that format. For example, DisplayString values (format "255a") are entered as plain text.
If there is no DISPLAY-HINT defined and no default format given in the View preferences then the value is entered as an hexadecimal string, for example: 'ab 8 2f 16' without the quotes.
For convenience, ASCII characters may be entered directly when they are enclosed by double quote characters ("). For example, if you enter ' "publi"1c ' this will result in the hex string '70 75 62 6c 69 1c'.
OBJECT IDENTIFIER
Enter an object name and press enter to convert the name into an OID and append then any instance suffix. For example, enter ifIndex and press Return and the displayed value will become '1.3.6.1.2.1.2.2.1.1'. Now append '.2' to reference the second interface. The resulting OID ('1.3.6.1.2.1.2.2.1.1.2') can then be send to the target agent.
Enumerated INTEGER
Select one of the enumerated values from the provided list or enter an integer value to set a value not defined in the MIB.
TimeTicks, Counter32, Counter64, Unsigned32, Integer 32, INTEGER
Enter a numeric value. You can use the spin box to browse through possible values. Range restrictions defined for the MIB object are not enforced by MIB Explorer, because the agent will reject out of range values anyway.
If there is a DISPLAY-HINT format defined for the MIB object, no spin box will be displayed and the value has to be entered according to that format.
BITS
The value may be entered as a series of 1 and 0 characters that are grouped in packets of eight bits separated by spaces. For example to set the second, fourth, and thirteenth bits enter '01010000 00001' without quotes.
IpAddress, NetAddress
Either enter the IP address in raw IP address format (e.g. "192.168.0.1") or enter the host name (e.g. "www.mibexplorer.com") and press Enter to resolve it into a raw IP address.
If a value does not comply with the input format, a beep will be emitted.
The node info window is opened by choosing the Node Info menu item (  ) from the MIB tree context menu. It shows detailed information about the SMI definitions for a node in the MIB tree. The info window can be opened for MIB object nodes under the Objects root node but not for instances.
The tab title denotes the MIB module that contains the shown definition which is:
The Name of the MIB object. The object name may differ for OBJECT-IDENTIFIER objects between MIB modules. For example the OID "0.0" is named "null" in RFC1155-SMI and "zeroDotZero" in SNMPv2-SMI.
The object identifier (OID) of the MIB object. The OID value is the same for all module tabs.
By clicking on the Path value, the named sub-identifiers from the current node up to the root node are displayed in a list.
If the node is an OBJECT-TYPE, the Effective Syntax represents the node's base syntax with all refinements. This base syntax is used by MIB Explorer (in combination with a possibly defined DISPLAY-HINT) to render and edit instances of the object.
The Definition text area shows the complete definition from the corresponding MIB module.
You can search the whole MIB Tree including possibly retrieved MIB object instances by regular expressions. A node whose specified property matches the given regular expression will be selected. With the Find Again ( ) menu item or button you are then able to find the next node that matches the expression.
To Find a Node:
1.Choose Find from the Edit menu or press from the main toolbar. The search dialog will be displayed.
2.Enter the Search Expression in regular expression syntax.
3.Select whether case should ignored or not. If selected, this will insert (?i) at the beginning of the used search expression.
4.Select what type of properties of a node you want to be matched against the search expression. Choosing All will match the whole SMI text of a MIB object node, including key words, or the value part of a MIB instance node against the given search expression.
To Find a Node Again:
1.Choose Find Again from the Edit menu or press from the main toolbar. The next node in depth first search order from the currently selected node will be searched matching the previously specified search expression and options.