With the preferences dialog accessible from the tool bar ( ) or with Edit>Preferences from the menu bar, MIB Explorer‘s settings are configured.
The preferences are divided into the top level areas of configuration that are described by following sub-sections.
The general preferences can be used to configure overall settings of MIB Explorer. These are:
Maximum number of undo/redo steps
Specifies how many undo steps should be stored by MIB Explorer. This value applies to each table or PDU frame independently.
Maximum number of instances retrieved for MIB tree
Specifies the maximum number of MIB object instances that will be retrieved for MIB tree and browse operations. Too many objects will unnecessarily consume memory and performance. A good choice is a limit of a few hundred or thousand objects. The limit can be disabled at all, by setting a zero value.
Load a target's associated MIB set (if present) when the target is selected
If checked, MIB Explorer will automatically load a target's MIB set (if there is any associated MIB Set) when a new target is selected.
Enable SET for variables with MAX-ACCESS read-only
Enabling this option allows you to use the Set Dialog on OBJECT-TYPES with MAX-ACCESS read-only and write or create "read-only" table columns using the Table View or Grid View. This option might be useful for testing purposes or when configuring an AGENT++ simulation agent, but this option should be disabled by default.
Confirm overwriting a file
If checked, MIB Explorer will always ask before it overwrites a file (except its configuration file).
Support obsolete RFC 1442 BIT STRING syntax
Enable this option to communicate with SNMP entities that implement and use the obsolete RFC 1442 BIT STRING syntax.
Use always GETNEXT instead of GETBULK
By enabling this option, MIB Explorer will never send GETBULK PDUs. Instead GETNEXT PDUs are used in a compatible way. This option is useful in an environment where agents exists, that are capable of SNMPv3 but do not support the GETBULK PDU type.
Multi-threaded column retrieval for wide tables
When checked and when a table has more columns than fitting in a single request PDU (limited by PDU Size), the additional requests for the off limit columns will be send immediately after the first without waiting for the response of the initial request. This can speed up table retrieval because agents fetch typically fetch (and cache) complete rows. Using multi-threaded column retrieval is the default.
The MIB Compiler preferences define where to store compiled MIB modules and other settings about the integrated MIB compiler.
MIB Repository Path
The MIB repository directory must be specified before any MIB modules can be compiled (see MIBs). It must exclusively contain compiled MIB modules and the MODULE.IDS file which stores module IDs.
Maximum Errors per MIB File
The maximum parse errors specify the number of errors the MIB compiler should collect before bailing out and reporting the found errors.
Record file name of the imported MIB file in the MIB repository
Activate this option, if you want to later append the original file name to the file name of exported MIB modules. The MIB compiler will store the file name but not any path information in the compiled MIB module file. See also section Exporting MIB Modules.
Compress MIB module files in the MIB repository
To save disk space, the compiled MIB modules can be stored in the MIB repository using GZIP compression. Deactivate this option if you are using AgenPro or MIB Designer with the same repository if either version is less than 2.5.
Compile MIBs Leniently
If the MIB files you want to use with MIB Explorer contain many errors you may use this option to compile those MIBs anyway with a minimum syntax error checking. Although this might work in most cases, lenient compiled MIB modules might cause problems - therefore they are marked with '(!)' in the module list.
When compiling „new“ MIB modules update existing if LAST-UPDATED is newer
If disabled, only MIB modules will be compiled and added to the current repository, that do not exists in the repository yet. If enabled, only MIB modules will be compiled as „new“ that do not exists, or have a LAST-UPDATED time stamp which is newer that those of the existing MIB module with the same name. SMIv1 modules will be always overwritten by SMIv2 modules of the same name.
The PDU Size settings define indirectly the maximum size of request PDUs sent by MIB Explorer. Because of implementation specific restrictions such as message buffer sizes not all SNMP agents are able to process arbitrary sized SNMP messages. Bigger values for the below parameters provide best
performance but result in a higher risk of timeouts, because of non-responding agents.
The maximum VBs per PDU restriction limits the number of variable bindings sent in a PDU on behalf of table retrieval operations. The maximum repetitions for GETBULK operations limits the number of 'rows' in a response PDUs to be sent by the target agent on behalf of table operations.
GET BULK repetitions
Specifies the maximum number of variable bindings an agent may return on a GETBULK request sent by MIB Explorer during a Browse or Get operation with SNMPv2c or SNMPv3.
Maximum VBs per PDU
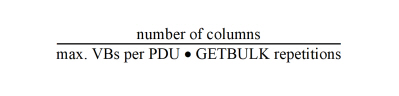
Specifies how many variable bindings should be sent by MIB Explorer in a GETNEXT or GETBULK request to retrieve table data. To optimize table operations, normally all column or scalar OIDs of a table are put together into one PDU. If the table has more columns or scalars than specified by this value, then MIB Explorer will send the following number of packets to retrieve a single row with SNMPv1:

and with SNMPv2c or SNMPv3:
In order to be able to receive SNMPv1 traps or SNMPv2c notifications and INFORM PDUs, MIB Explorer has to be configured to listen on at least one UDP or TCP port on a specific or all local address(es). The default is UDP port 162 on all local IP addresses ("0.0.0.0"). You can specify listen addresses and ports in the following subtopics:
UDP Trap Addresses
TCP Trap Addresses
TLS Trap Addresses
To receive SNMPv3 notifications and INFORM PDUs, MIB Explorer needs its own (unique) authoritative SNMP engine ID specified. MIB Explorer accept all notifications and traps but can only decrypt those SNMPv3 authPriv packets where a matching USM user is marked in the USM user tab of the Target settings as principal.
Once you are able to receive traps and notifications, you might want to prioritize them according to their trap/notification ID. You can do this using the Trap Priorities subtopic.
The general trap receiver settings specify MIB Explorer's behavior when a new trap or notification is received:
To Add a Trap Listen Port:
1.Choose Add from the Notification Listen Addresses area. A trap listen address configuration dialog will be shown.
2.Choose one of the local system's IP addresses from the drop down list. 0.0.0.0 represents all local addresses.
3.Choose the UDP port to listen on.
4.Press OK to activate the listen address.
To Specify Authoritative Engine ID:
1.Either press the Default button or enter a 5 to 32 bytes long Authoritative Engine ID as a hexadecimal string into the corresponding text field. If the entered engine ID has less than 5 or more than 32 bytes or is otherwise invalid, the default authoritative engine ID will replace the entered value when preferences are saved.
To Specify Principals for Trap Reception:
If you want to enable trap reception for some management targets:
1.Choose one or more targets from the "Available Principals" list for which you want to enable encrypted trap reception.
2.Press the Add button.
If you want to disable trap reception for some management targets:
1.Choose one or more targets from the "Enabled Principals" list for which you want to disable trap decryption.
2.Press the Remove button.
Actions on New Trap:
Beep
If checked, an audio beep is emitted whenever a new trap or notification is received.
Bring trap receiver to front
If checked, the trap receiver frame is brought to front whenever a new trap or notification is received, even if the trap receiver frame has not been visible.
Auto-Inhibition
The auto-inhibition hides new traps in the trap receiver dialog if more than the specified amount of traps per second is received for within a interval of the specified number of seconds.
INFORM Response Delay
To be able to test INFORM request command responder implementations, simulating a slow INFORM response sending could be necessary. Specifying a value greater than zero (and less than 300000ms = 5min) activates INFORM response sending for all incoming INFORM requests. Zero or any out-of-range value disables the delay.
If you specify a notification history file by checking the “Use persistent notification history” box, notifications and traps received by MIB Explorer will be stored on (normal) application exit to the specified file. At application restart, this file is read again to fill the trap receiver table with the previously received traps.
With the Trap Priorities settings you can specify logging severities for categories of incoming traps, notifications, and inform messages. The severity is determined by analysis of the notification ID. For each incoming trap/notification, the trap severities table will be searched for the entry (category) whose subtree object identifier (OID) is the longest possible match. The severity for this message will then be set to the severity specified for the matched category.
The trap severities configuration table has the following columns:
|
Column |
Description |
|---|---|
|
Subtree |
The OID of the subtree for which a trap/notification severity (=priority) is defined. Matching entries with longer (subtree) OIDs override entries with a shorter OID. |
|
Severity |
The severity defines the trap/notification priority. The severity FATAL has the highest priority and INFO the lowest. |
|
Script |
The path of a MIB Explorer script (see below) that has to be executed when this entry matches an incoming trap or notification. |
|
Comment |
An arbitrary comment that can be referenced by the above script. |
If there has been assigned a MIB Explorer Script for the matched category, then the corresponding script will be executed with the snmp, utils, and smi contexts and additionally the following special context values:
|
Context |
Description |
|---|---|
|
severity |
The assigned severity for the received notification as one of the following strings: FATAL, ERROR, WARN, and INFO. |
|
content |
The comment string assigned to the category the received notification matches or null if the comment is left empty. |
|
sourceAddress |
The complete source address of the notification. |
|
sourceHost |
The host (IP address) of the notification source. |
|
sourcePort |
The UDP or TCP port of the notification source. |
To Open the Trap Severities Editor:
1.Open Preferences from the Edit menu.
2.Choose Trap Receiver from the preferences tree.
3.Add or remove categories by either using the Add orRemove buttons respectively or alternatively using the context menu of the shown table.
4.Press OK to save your changes.
To Configure a Script for a Notification Category:
1.Select the category row by clicking on the row's Script column cell.
2.Open the context menu by pressing the right mouse button.
3.Choose Script... and choose or enter the file name of the script to run for notifications of this category.
4.Press OK to save your changes to the category.
There is an example for sending an email when receiving a trap in the examples/script directory of the MIB Explorer installation named email_on_trap.vm.
To receive traps, notifications, and inform requests over UDP, you can specify the local UDP listen address(es) and port(s) here. If the status of a listen port is 'Unavailable' then the port is used by another application or MIB Explorer has insufficient system rights to bind the port. On UNIX system, for example, super-user rights are needed to bind ports below 1024.
When you add a listen address, MIB Explorer immediately tries to bind the address. The status column of the configuration table indicates then whether binding the address and port was successful (status Available) or not (status Unavailable). When closing the preferences dialog, MIB Explorer will update its configuration again, depending on whether you saved your changes or not.
To receive traps, notifications, and inform requests over TCP, you can specify the local TCP listen address(es) and port(s) here. If the status of a listen port is 'Unavailable' then the port is used by another application or MIB Explorer has insufficient system rights to bind the port. On UNIX system, for example, super-user rights are needed to bind ports below 1024.
When you add a listen address, MIB Explorer immediately tries to bind the address. The status column of the configuration table indicates then whether binding the address and port was successful (status Available) or not (status Unavailable). When closing the preferences dialog, MIB Explorer will update its configuration again, depending on whether you saved your changes or not.
To receive traps, notifications, and inform requests over TLS or DTLS, you can specify the local (D)TLS listen address(es) and port(s) here. If the status of a listen port is 'Unavailable' then the port is used by another application or MIB Explorer has insufficient system rights to bind the port. On UNIX system, for example, super-user rights are needed to bind ports below 1024.
When you add a listen address, MIB Explorer immediately tries to bind the address. The status column of the configuration table indicates then whether binding the address and port was successful (status Available) or not (status Unavailable). When closing the preferences dialog, MIB Explorer will update its configuration again, depending on whether you saved your changes or not.
The SNMPv3 settings local engine ID and engine boots counter do not need to be changed manually in general. However, if you encounter connectivity problems then a probable cause might be an agent that is using the same engine ID as MIB Explorer's default engine ID. In this case, you should change the local engine ID (or the remote - if feasible) to make both unique again.
Note: Changes to these settings take effect after restarting MIB Explorer.
The engine boots counter should be strictly monotonic increased. It is automatically increased by one on each restart of MIB Explorer.
Authoritative Engine ID
The engine ID that uniquely identifies the authoritative SNMP entity MIB Explorer. All SNMPv3 applications and services running in a network must have such unique identifier. It is therefore recommended to include IP address and SNMP port in the authoritative SNMP engine ID. MIB Explorer by default includes the local host name into the default engine ID if available.
Engine Boots
The engine boots counter should not be decreased because this could cause interoperability problems with running SNMPv3 entities. The boots counter can be manually increased to force time resynchronization with SNMPv3 entities contacted after increasing the counter value.
Report Security Level Strategy
Reports send by a SNMPv3 entity should be send with the same security level of the request that triggered the report. This the standard behavior of MIB Explorer and complies to the SNMPv3 standard.
This standard configuration makes it difficult to detect problems with an authentication or privacy configuration, because the report cannot be sent based on the configuration error. In such a case, it might be reasonable to relax the setting to noAuthNoPrivIfNeeded.
The setting neverNoAuthNoPriv provides maximum security, but also limited error detection.
Non-Standard Privacy Protocol OID Mapping
There are some privacy protocols which have never been propagated to an RFC. Those protocols have no assigned standard object identifier (OID) to identify them in USM operations. SNMP4J and MIB Explorer use OIDs defined in the OOSNMP-USM-MIB created by AGENTPP.
Non-AGENTPP based products, might use different OIDs for the non-standard AES protocols with 192 and 256bit keys.
In the provided table, any other OID can be defined for the listed protocols. The mapping is needed to run the USM key exchange operations to change passphrases/keys with Edit>Create/Modify SNMPv3 User on target systems that use custom OIDs.
For any other SNMPv3 operations the mapping is not relevant.
The supported transport protocols are:
User Datagram Protocol (UDP)
Transmission Control Protocol (TCP)
Transport Layer Security (TLS)
Datagram Transport Layer Security (DTLS)
At least one transport protocol needs to be enabled in order to be able to communicate with a SNMP entity. The default transport protocol is UDP, but there are also SNMP agents that support TCP as well as the new (D)TLS transport mappings. TCP and TLS provide better performance for bulk data retrieval than UDP and DTLS respectively. (D)TLS in addition simplifies security deployment by using established certificate infrastructure.
The UDP transport mapping is the default transport mapping for SNMP. By default the wildcard IP address '0.0.0.0' with the wildcard port '0' will be used to send SNMP requests and receive responses. You may choose other values although ports below 1024 may require system administrator privileges on some operating systems.
When you first run MIB Explorer, the default UDP transport mapping will be added to the configuration.
The elements that define a transport mapping are:
Enabled
If checked UDP is made available as transport mapping. If UDP is disabled you will not be able to access most SNMP devices, since UDP is the default transport mapping for SNMP.
IP Address
The local IP addresses and the wildcard address 0.0.0.0 are listed here and can be chosen as source address for SNMP packets sent by MIB Explorer.
UDP Port
The source UDP port for outgoing SNMP packets. The outgoing UDP port is different from the incoming - well known - SNMP port. It is highly recommended to use the wildcard port 0 the allow MIB Explorer to choose any free port above 1024.
Maximum Inbound Message Length
The maximum inbound message length defines the maximum allowed number of bytes SNMP response PDUs returned to MIB Explorer may have. It is recommended for most situations to use 65535 bytes. A smaller value may cause tooBig errors if an agent tries to sent a bigger response than specified here.
The TCP transport mapping is an alternative transport mapping for SNMP which can increase performance when retrieving bulk data from a few devices. By default the wildcard IP address '0.0.0.0' with the wildcard port '0' will be used to send SNMP requests and receive responses. You may choose other values although ports below 1024 may require system administrator privileges on some operating systems.
The elements that define a transport mapping are:
Enabled
If checked then TCP is made available as transport mapping.
IP Address
The local IP addresses and the wildcard address 0.0.0.0 are listed here and can be chosen as source address for SNMP packets sent by MIB Explorer.
TCP Port
The source TCP port for outgoing SNMP packets. The outgoing TCP port is different from the incoming - well known - SNMP port. It is highly recommended to use the wildcard port 0 the allow MIB Explorer to choose any free port above 1024.
Maximum Inbound Message Length
The maximum inbound message length defines the maximum allowed number of bytes SNMP response PDUs returned to MIB Explorer may have. It is recommended for most situations to use at least 65535 bytes. A smaller value may cause tooBig errors if an agent tries to sent a bigger response than specified here.
Connection Timeout (TCP and TLS only)
The connection timeout specifies the amount of time in seconds, a connection (TCP and TLS) remains open while no data has been exchanged. After the timeout, MIB Explorer will close the connection and reopen it, once data has to be sent again.
The default timeout is one minute. Keeping the connection open for longer time may reduce connection initialization overhead, especially for TLS.
The basic Transport Layer Security settings are the same as for “TCP”.
With the (D)TLS Security settings, you can choose the (D)TLS version to use and other security properties. Changing the TLS version applies after restarting MIB Explorer.
(D)TLS Version
TLS v1.0, 1.1, and 1.2 are supported for TLS and DTLS v1.0 or v1.2 are supported for DTLS.
Key Store File
A Java key store file that contains X.509 certificates for the (D)TLS transport mapping according to RFC 5953.
Note: The password will be stored in plain text in the MIB Explorer configuration file unless you have set a master password.
With a master password set, all USM passphrases, community names, and key store passwords are AES128 encrypted.
Key Store Password
The password for the key store file.
Test
Test the loading of the key store file with the specified password and displays success or failure in a message box.
4.6.5(D)TLS Security Name Mapping
Because the transport layer security model does not exchange a security name on the wire, the security name used by the View Access Control Model (VACM) to authorize access to a SNMP entity, has to be derived from authentication identities. As those identities are certificates, a mapping specification has to be provided that assigns a security name to a fingerprint, subject distinguished name (DN), issuer DN, and other attributes of a X.509 certificate.
Those mappings are used for notifications by MIB Explorer and can be specified here.
The Fingerprint column specifies the certificate‘s fingerprint that is mapped to a security name. The Type column defines the mapping type (see RFC 5953) and the Data column defines the security name.
If type is Specified then Data contains the security name whereas for all other mapping types, the security name will be derived from a certificate attribute.
4.6.6(D)TLS Accepted SubjectDN
The (D)TLS protocol requires client and server authentication by exchanging X.509 certificates. The remote SNMP entity then needs to accept the presented certificate based on key attributes of the certificate. Such an attribute is either the subject distinguished name (DN) or the issuer DN of the certificate. You can here specify a list of accepted certificate DNs.
The list of Distinguished Names (DN) identifying remote certificates provided here, accept those certificates as authorized to access this SNMP entity.
The view preferences tab can be used to configure the appearance of MIB Explorer:
SMI Definition Font Size
Specifies which font size should be used for the SMI definition text area.
Default OCTET-STRING Display Mode
The default OCTET-STRING display mode is used when there is no DISPLAY-HINT defined for a variable binding.
Enable syntax highlighting for SMI Definition pane
Specifies whether the SMI definition text should be displayed colored or not.
Enable syntax highlighting for MIB Editor
Enables syntax highlighting for the MIB file editor. Disabling syntax highlighting may slightly improve performance and also disables font styles when printing a MIB file.
Split MIB tree and Tools pane horizontally
Splitting the main window horizontally between tree and tools panel is the default. Nevertheless, for some purposes it might be useful to split them vertically.
Resolve OIDs to object names if feasible
If checked, OIDs will be displayed as the last known object name in the path denoted by the OID (last name) plus the remaining OID suffix in dot notation. For example, the OID 1.3.6.1.2.1.1.1.0 will be displayed as sysDescr.0 if the SNMPv2-MIB is loaded or as mib-2.1.1.0 if only SNMPv2-SMI MIB module is loaded.
Update Browse pane while retrieving instances (slow)
For better performance, MIB object instances are not displayed in the browse tab as while they are being received. Instead, they are displayed at once when all instances have been received or the operation has been canceled. By checking this box, immediate update of the browse view is enforced.
Enable cell delta highlighting in Table View by default
If checked, the Table View will use an orange background for cells that have changed their content between the last and the actual refresh (or manual update).
Enable auto-save (restore) of changed column widths in Table Views
If checked, changed column widths are automatically saved and restored when the same table (MIB object) is viewed again. As this option saves changed column width for each opened table node, it requires more disk space for the MIB Explorer configuration file, if enabled.
Choose the Look&Feel you want to use for MIB Explorer. There are ten Look&Feels built-in. The selected Look&Feel will be loaded when MIB Explorer is restarted. On most systems, the “Flat Look and Feel” provides the best results in regard of UI element usability.
Experts may enter the Java class name (including package name) of a third party Look&Feel if the appropriate JAR file is added to the classpath of MIB Explorer.
Some look & feels may cause exceptions on certain platforms, if you encounter such an exception and you cannot start MIB Explorer to change the look & feel to the default again, then remove the row starting with LookAndFeel from the mxp4.cf file in your home directory. MIB Explorer will then use the default look and feel which does not cause the exception.
With MIB Explorer 5.0 and later, an Internet proxy can be configured for:
Viewing MIB Explorer help using with the built-in JavaFX browser. See also View.
Updating MIB Explorer and notifying about the availability of new (free) updates and upgrades, see Updates and Upgrade.
By default, MIB Explorer uses the same settings as your operating system for Internet proxy. There might be cases where the proxy settings of the operating system are wrong, incompatible with Java, or otherwise not accessible.
Then please switch off the check box Use system proxy and provide the following parameter manually:
Proxy Host:Port - The IP(v4/v6) address or the fully qualified domain name of the Internet proxy host is configured by the first field.
In the second field, the TCP port is configured, which is typically 80, 8080, or 3128.
No Proxy Hosts - A list of domain names or IP addresses, separated by a pipe symbol (|) for which no proxy should be used. This should include the at least localhost|127.*|[::1] to allow MIB Designer’s Java Runtime services on the local host.
Proxy server requires password - Check this option if the proxy you want to use requires authentication using user name and password.
Proxy User - The user name for the proxy authentication.
Proxy Password - The password for the proxy authentication.
Note: The proxy password will be stored in clear text in the MIB Explorer configuration file in your home directory.